The Clip tool is built for versatility: use it to capture high-energy highlight reels during the action, or trim full event replays into polished videos once the session is over.
⚠️ CRITICAL: 7-Day Expiry Window
This tool utilizes Time-Shift data, which is only cached for 7 days. To keep your clips permanently, you MUST click "Save to Media Center" before this window closes. Once expired, the raw footage cannot be retrieved for clipping.
Step 1: Identify Your Content
In the Clip tab, the timeline features Blue Blocks, representing available stream history.
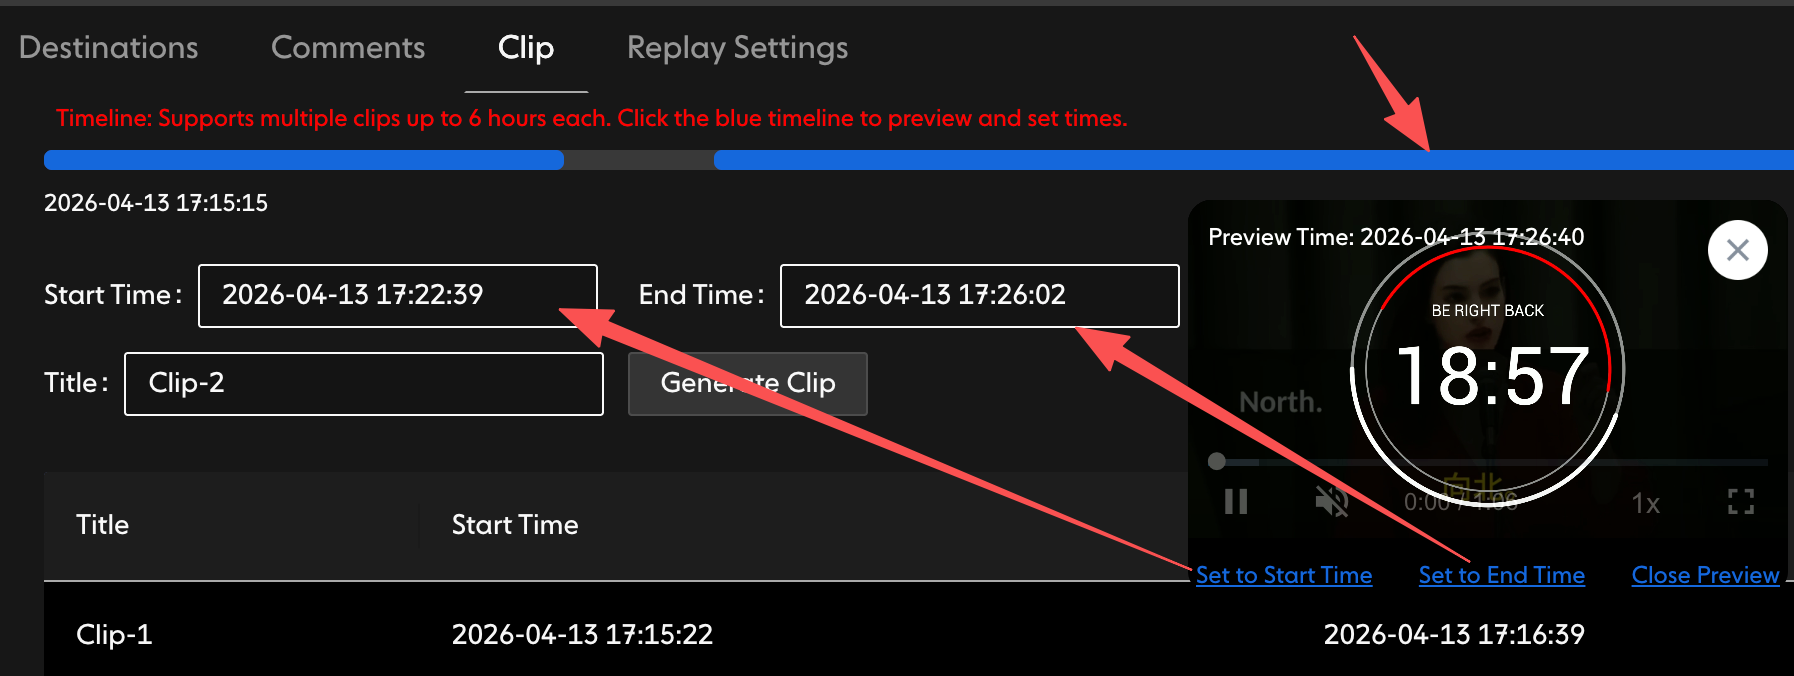
Instant Seek: Click anywhere on a Blue Block to preview that specific moment.
Flexible Length: Whether it's a 30-second highlight or a 6-hour full replay, you can clip it all here.
Step 2: Define the Range
Use our Snap Markers to set your boundaries with frame-perfect precision:
Find the start of your highlight or replay and click Set to Start Time.
Find the conclusion and click Set to End Time.
Give your segment a title and click Create Clip.
Timeline Editor: Use markers to quickly define your highlight or replay range.
Step 3: Secure Your Files
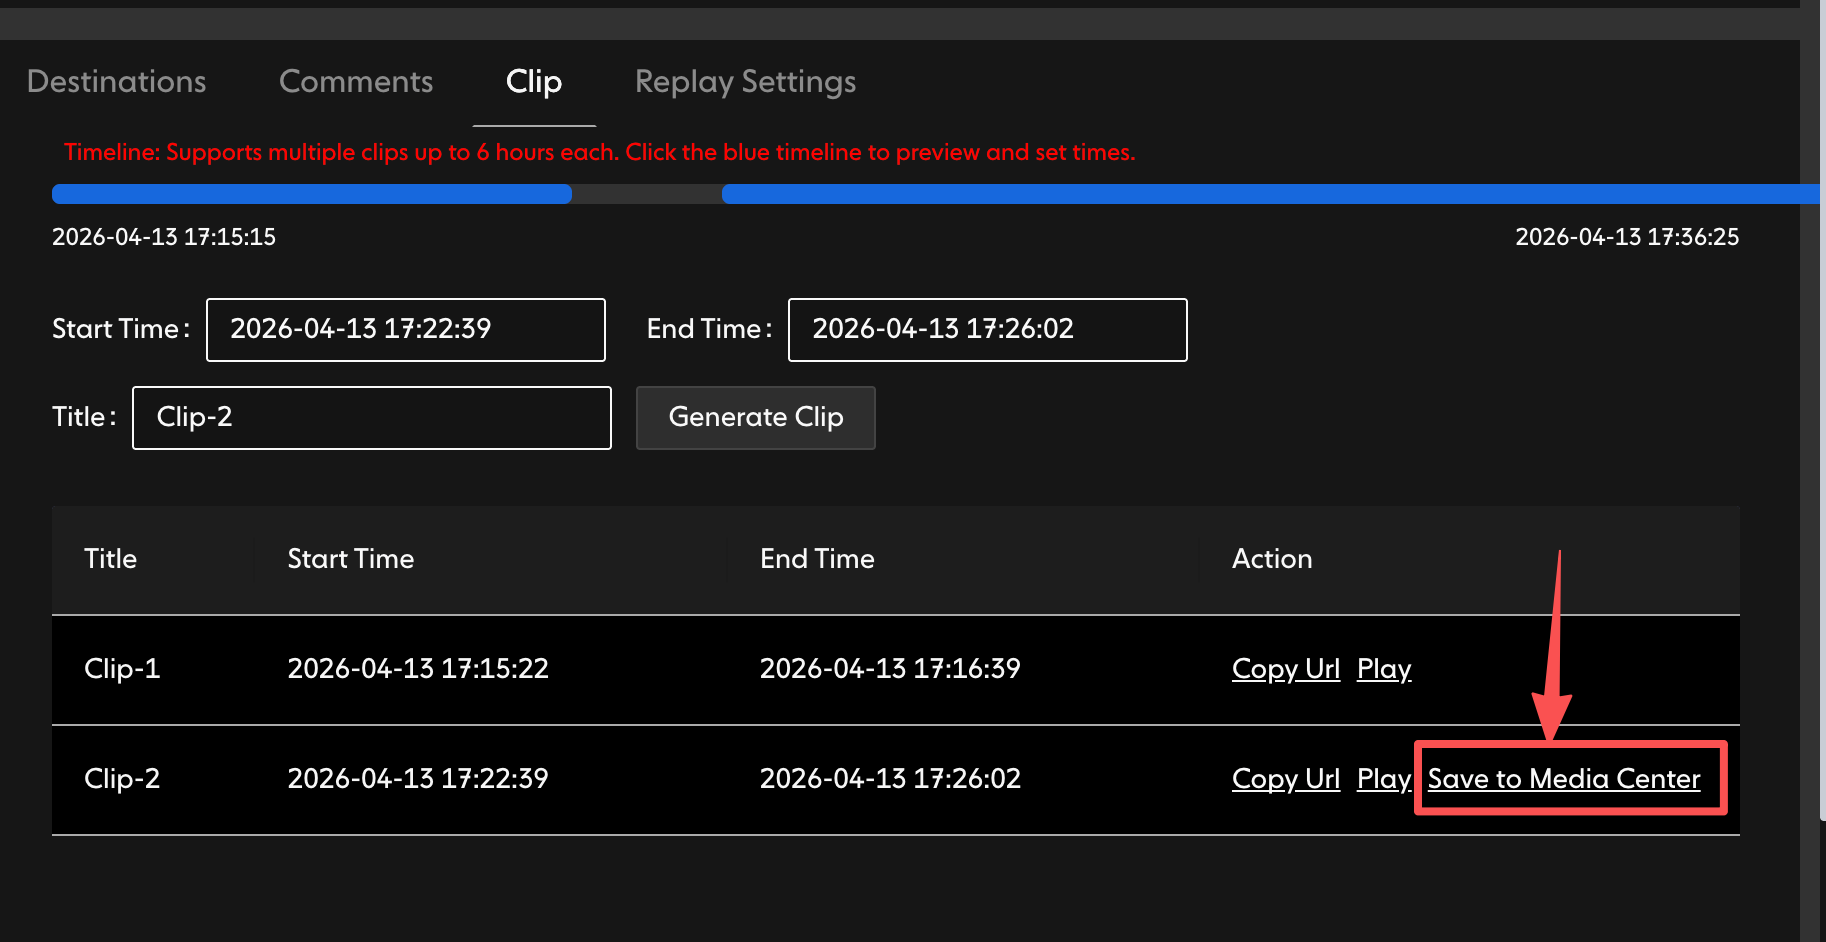
Newly generated clips are stored as Cache-only. To prevent them from being deleted after 7 days:
Locate your clip in the history list below the timeline.
Click Save to Media Center.
Once synced, the video moves to your permanent library for future downloads or Simulated Live use.
Clip History: Always sync important clips to ensure they never expire.
✅ Summary
Select Range → Generate Clip → Save to Media Center before the 7-day limit.