Maximize the value of your content by turning past broadcasts into fresh "Simulated Live" experiences. This process involves clipping, syncing, and rescheduling.
💡 Pro Tip: Use the Clip tool to remove "dead air" or technical setup time from your previous streams, ensuring your Simulated Live starts with high energy immediately.
Step 1: Clip Your Highlights
Open your previous event in the Livestream dashboard.
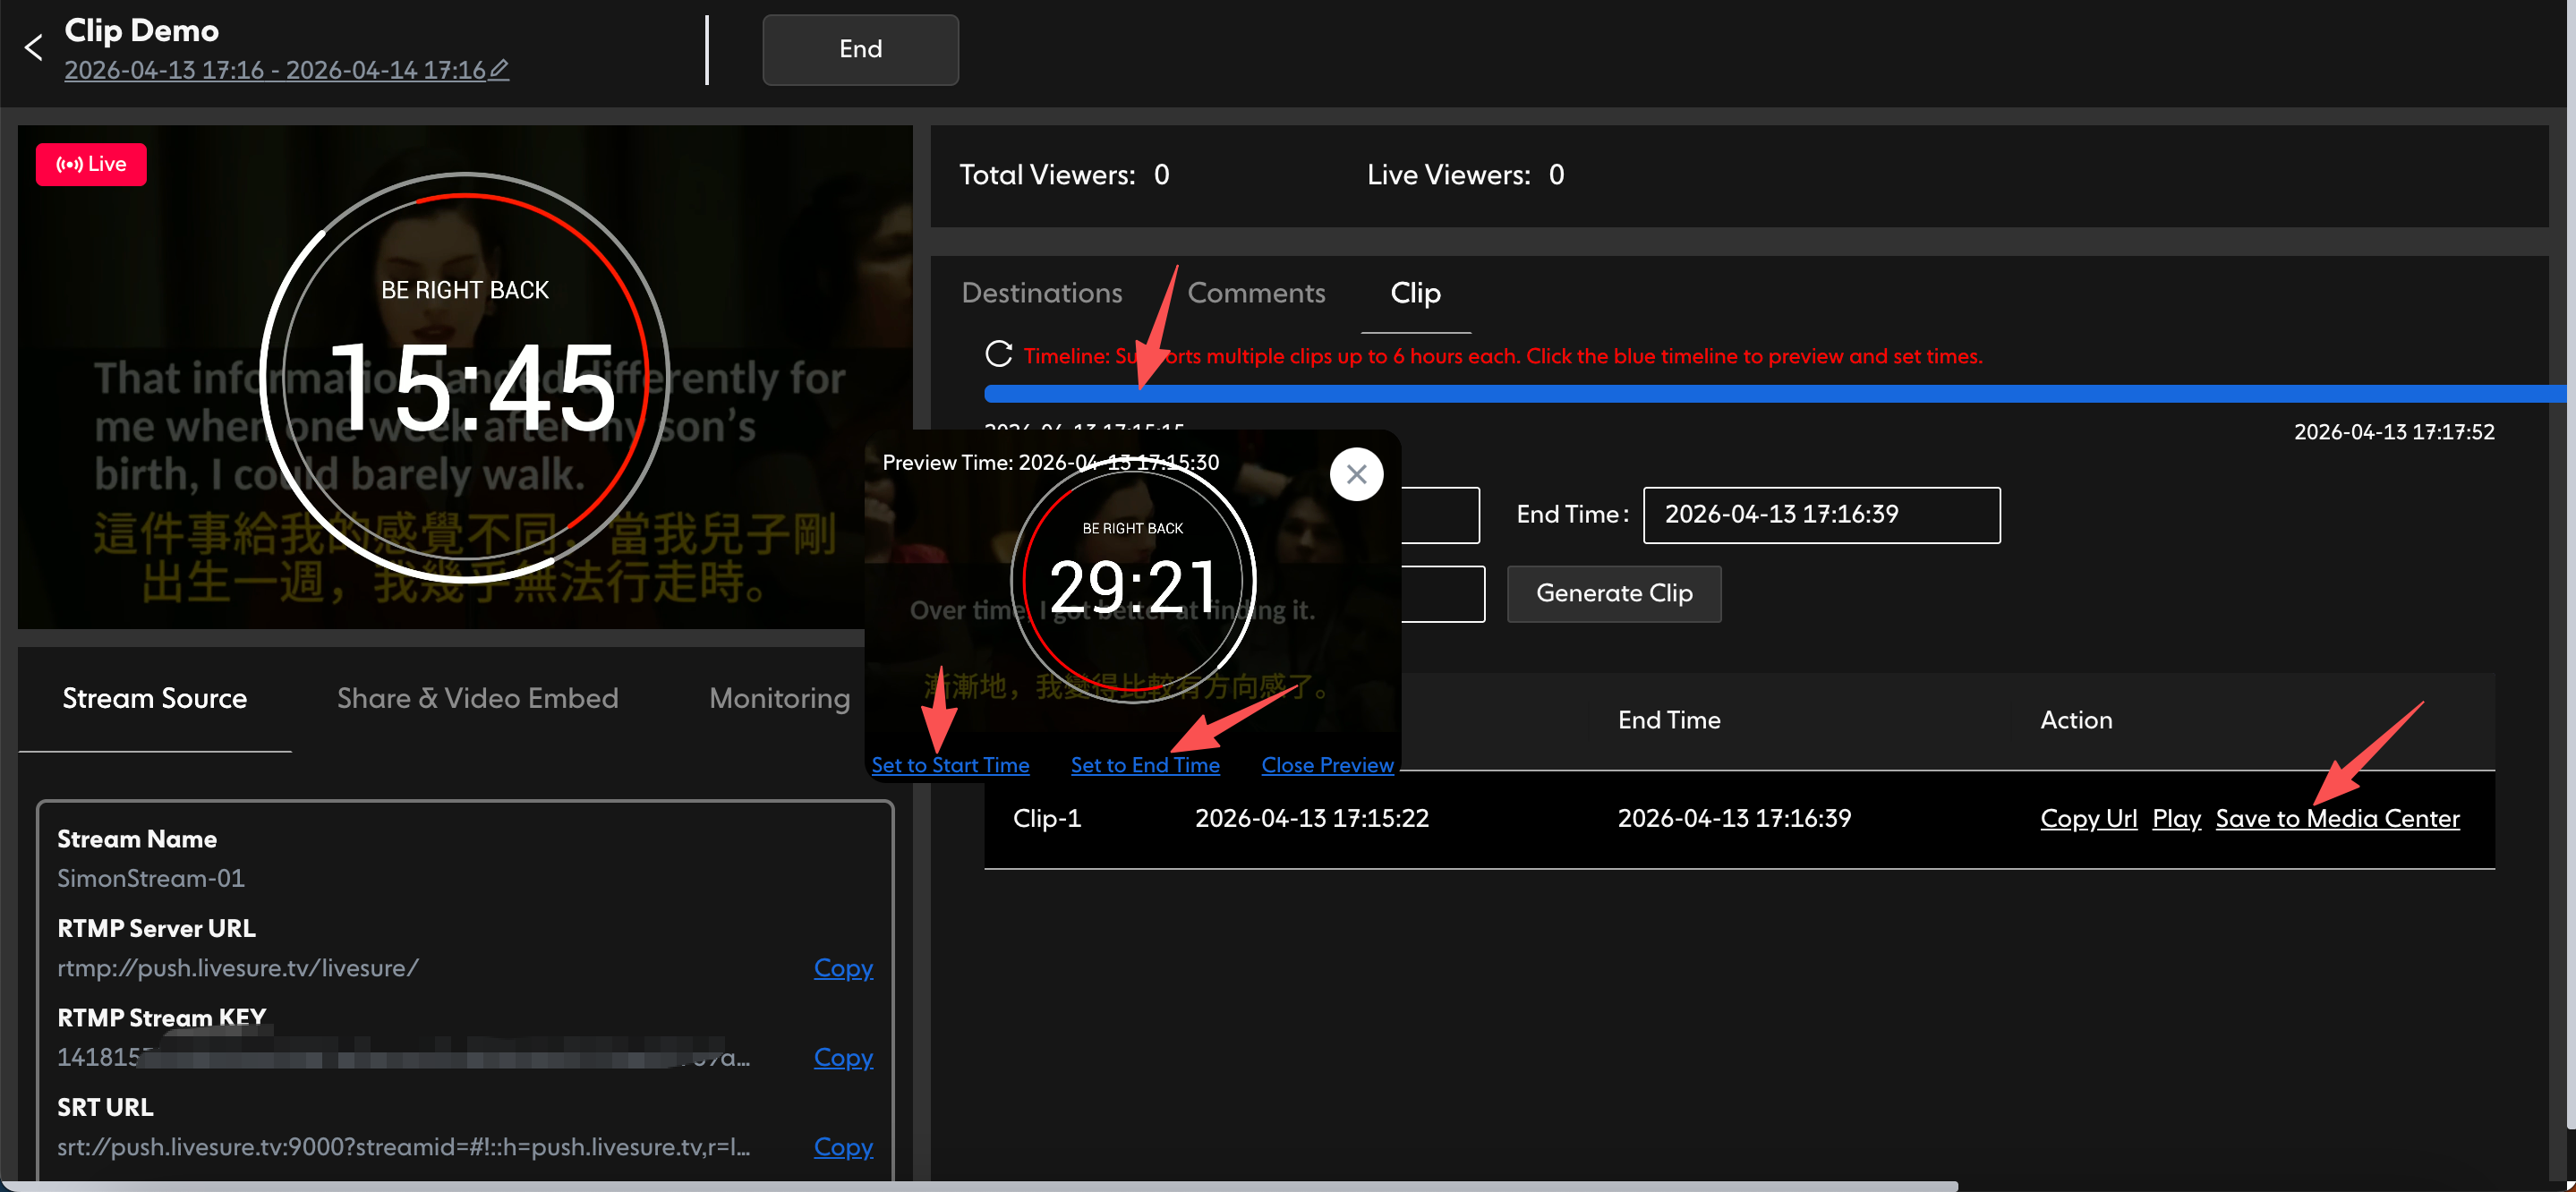
Navigate to the Clip tab located below the main player.
Select Duration: Click and drag the blue boundaries on the timeline to set your start and end points. You can capture segments up to 6 hours long.
Preview the selection and click Generate.
Step 2: Sync to Media Center
Once your clip is ready, select it from your clip history.
Click the Save to Media Center button. This ensures the file is permanently stored and ready for reuse in any new event.
Step 3: Schedule the Simulated Live
Go to the Simulated Live menu on the left sidebar and create a new event.
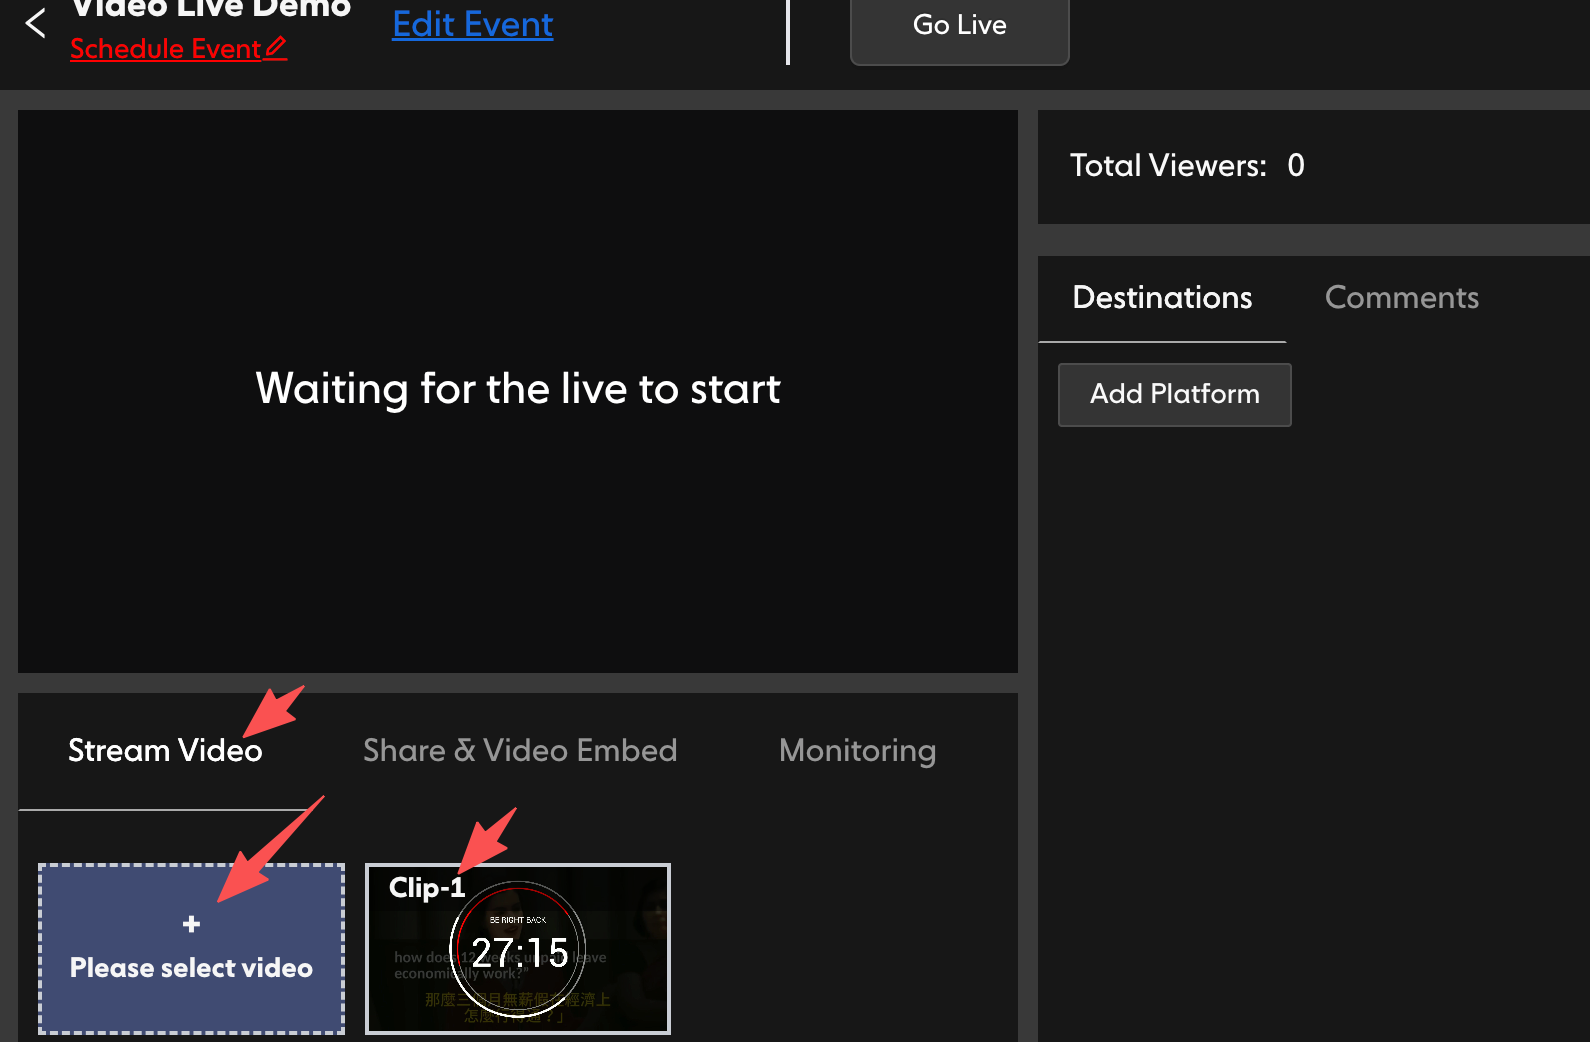
Inside the event console, go to the Stream Video tab.
Choose your synced clip from the library. You can select multiple clips to play in succession.
Click Go Live to broadcast your polished, pre-recorded content to your audience.